Collecting Signatures
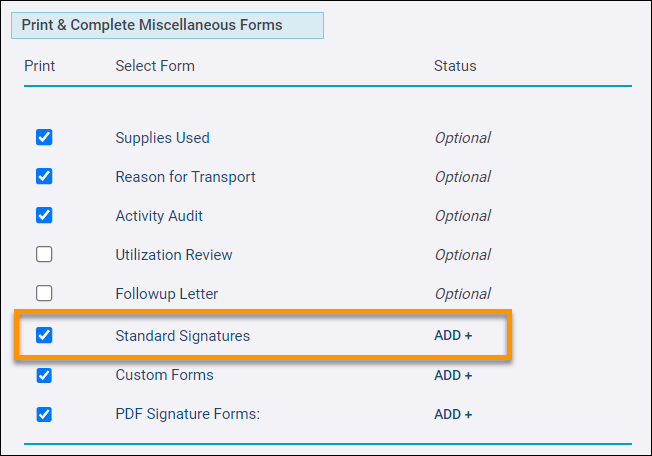
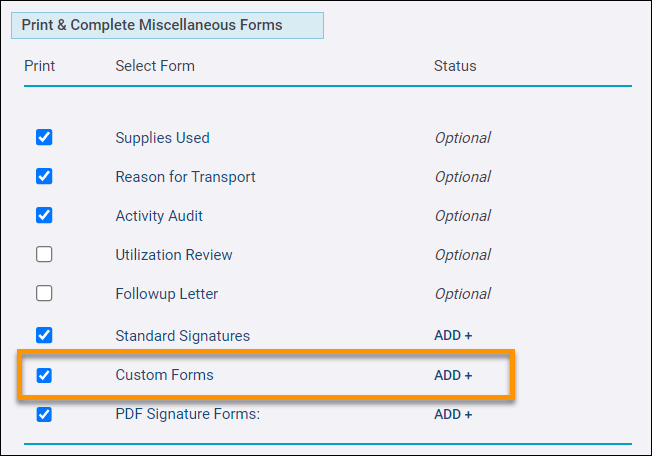
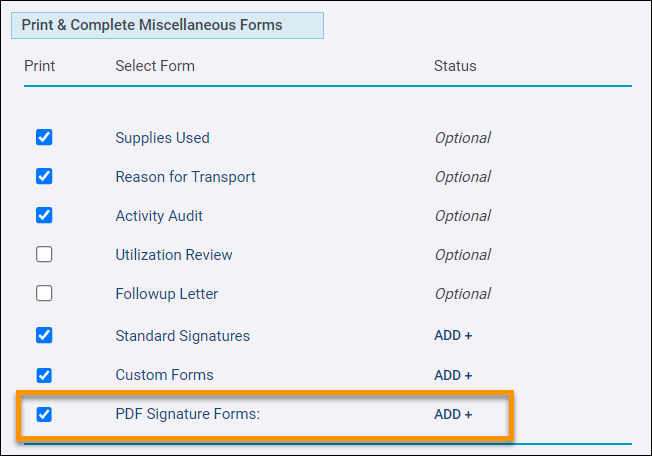
ZOLL emsCharts provides three primary ways of collecting signatures on your PCRs. You will find each option in the 'Print & Complete Miscellaneous Forms' section on Page 9 of charts.
Each method has its own intended purpose and they all function a little differently. Click a method below to learn more.
-
Standard Signatures: Uses the PWW (Page Wolfberg & Wirth National EMS Industry Law Firm) approved acceptance signature form to capture Sections I, II, and III. Does not allow for capturing refusal signatures. Learn about Configuring Standard Signatures.
-
Custom Forms: Looks similar to Standard Signatures but only has one "section" and allows administrators to create custom-labeled signature capture fields. Learn about Configuring Custom Forms.
-
PDF Signature Forms: Administrators can upload PDF files into ZOLL emsCharts. An invisible overlay on the forms allows crew members to write on the form like a digital whiteboard. Learn about Configuring PDF Signature Forms.
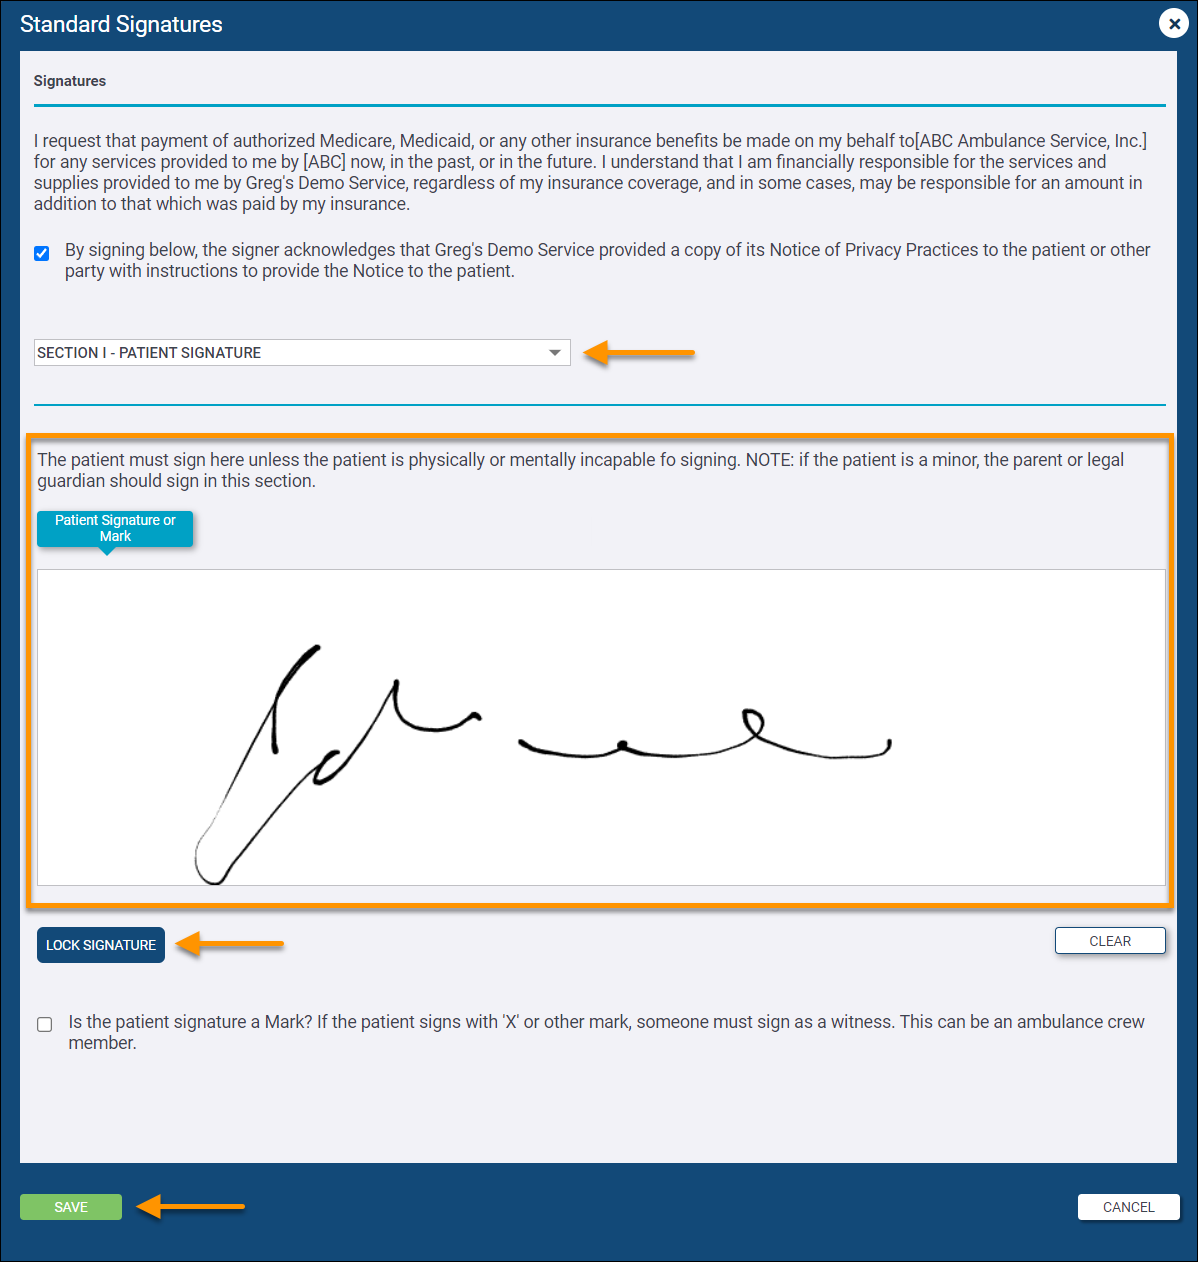
Important! When collecting signatures, make sure to click LOCK to capture the canvas once it has been signed. Clicking SAVE will save the signature form to your chart, but any unlocked signatures will be lost.
Watch this video for a visual journey through configuring and collecting signatures in ZOLL emsCharts.
The Standard Signatures form uses the nationally recognized standard EMS acceptance signature form, including Section I - Patient Signature, Section II - Authorized Representative Signature, and Section III - Ambulance Crew and Receiving Facility Signatures. This form will help you maintain compliance with Medicare. The Standard Signature form does not allow for capturing refusal signatures. Administrators, learn about Configuring Standard Signatures.
To capture a Standard Signature, click ADD + next to Standard Signatures in the 'Print & Complete Miscellaneous Forms' section on Page 9 of a chart.
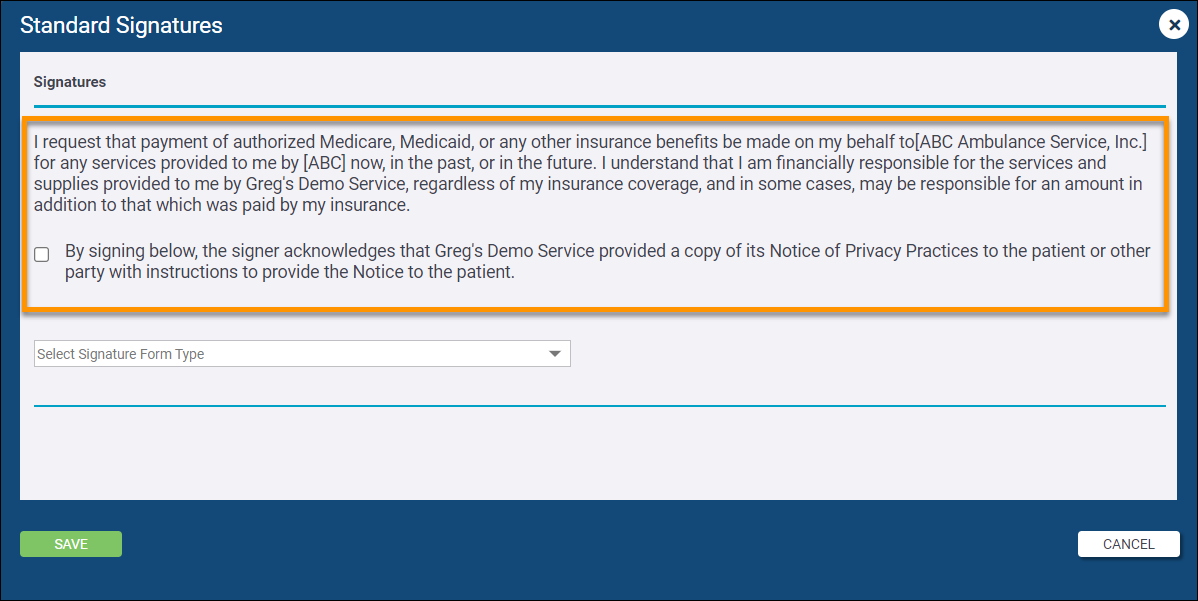
You will be presented with the Standard Signatures form which will have a general header and a privacy practice acknowledgment check box. Both the header and acknowledgment stay consistent regardless of the Section you choose.
Note: The header and privacy practice acknowledgment can be customized by your administrator.
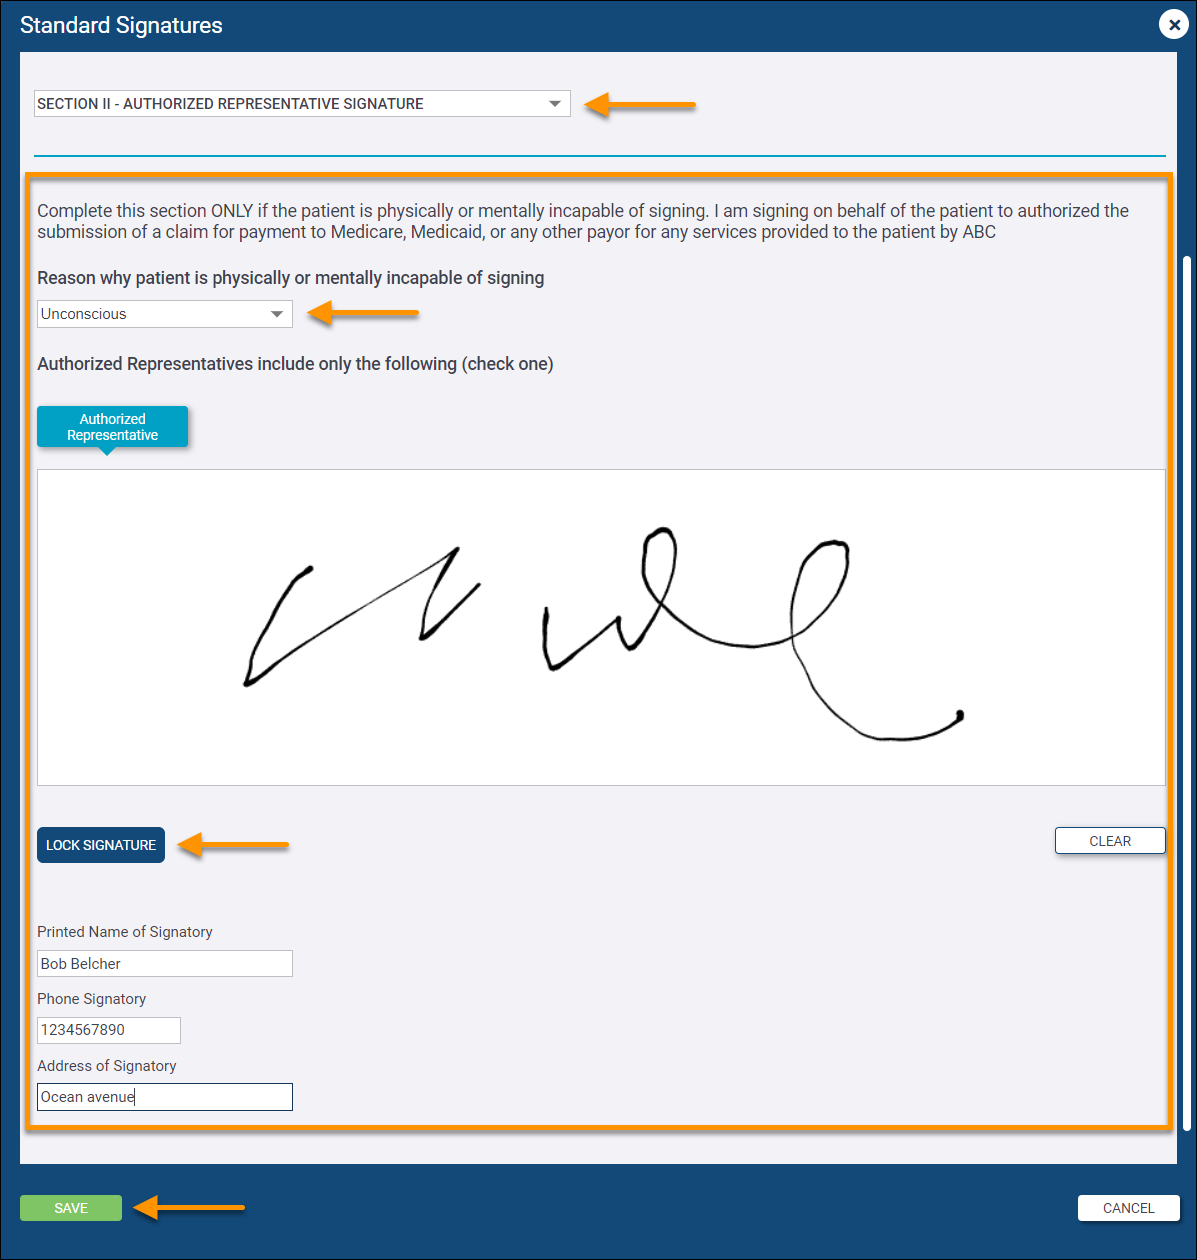
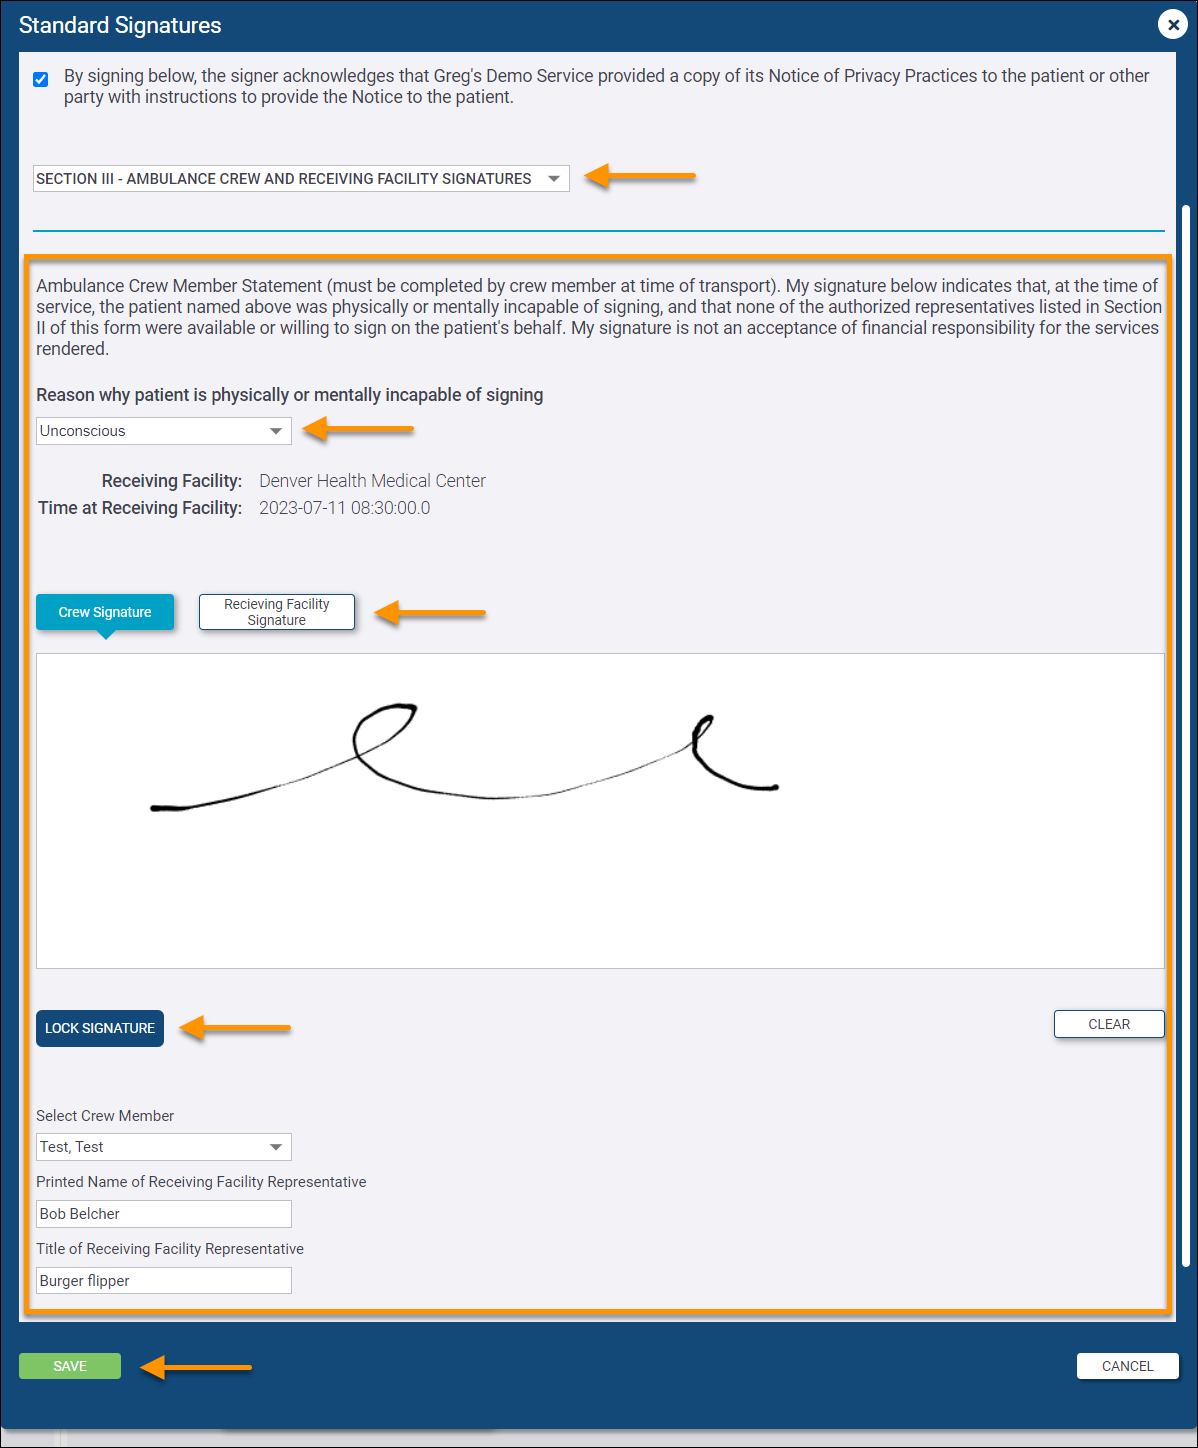
Choose your Section. Each Section is for capturing a different signature. You can only capture one Standard Signature Section per chart. The person(s) signing will determine the Section you select. Make sure to click LOCK after signing to capture the canvas, and when you are finished filling out the form completely, click SAVE to save and attach the Standard Signature form to the chart.
-
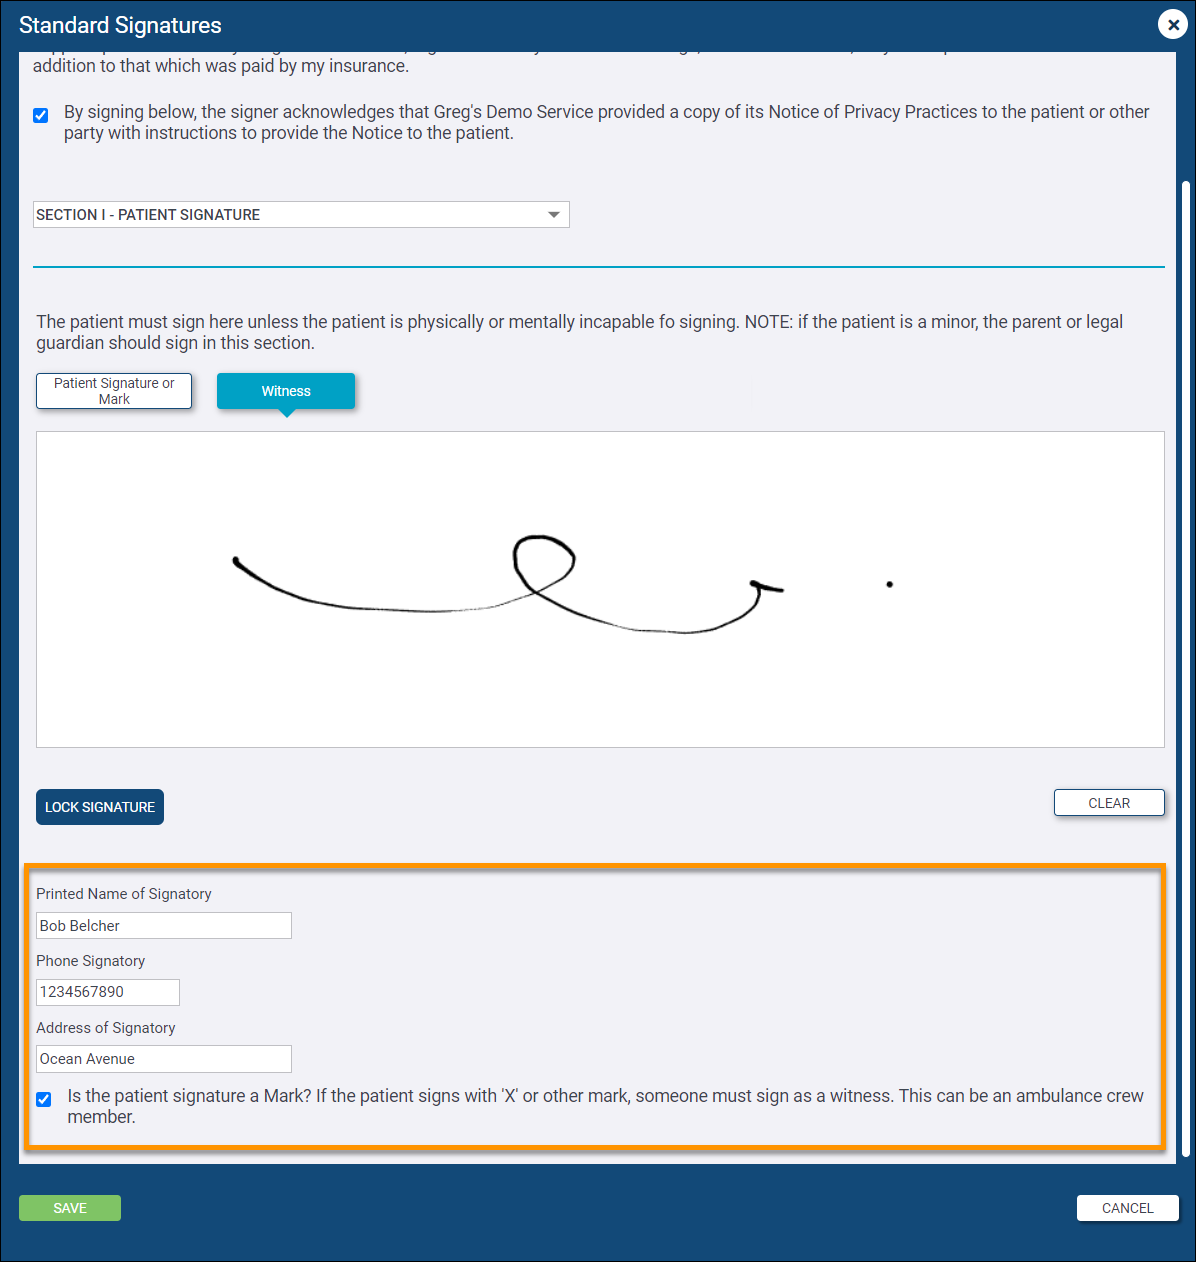
SECTION I - PATIENT SIGNATURE
Note: Use the 'Is the patient signature a Mark?' checkbox to enable and capture a Witness signature. If you capture a Witness signature, you must enter the signatory name.
-
SECTION II - AUTHORIZED REPRESENTATIVE SIGNATURE
Note: You must choose a 'Reason why patient is physically or mentally incapable of signing' and enter the signatory name, phone number, and address.
-
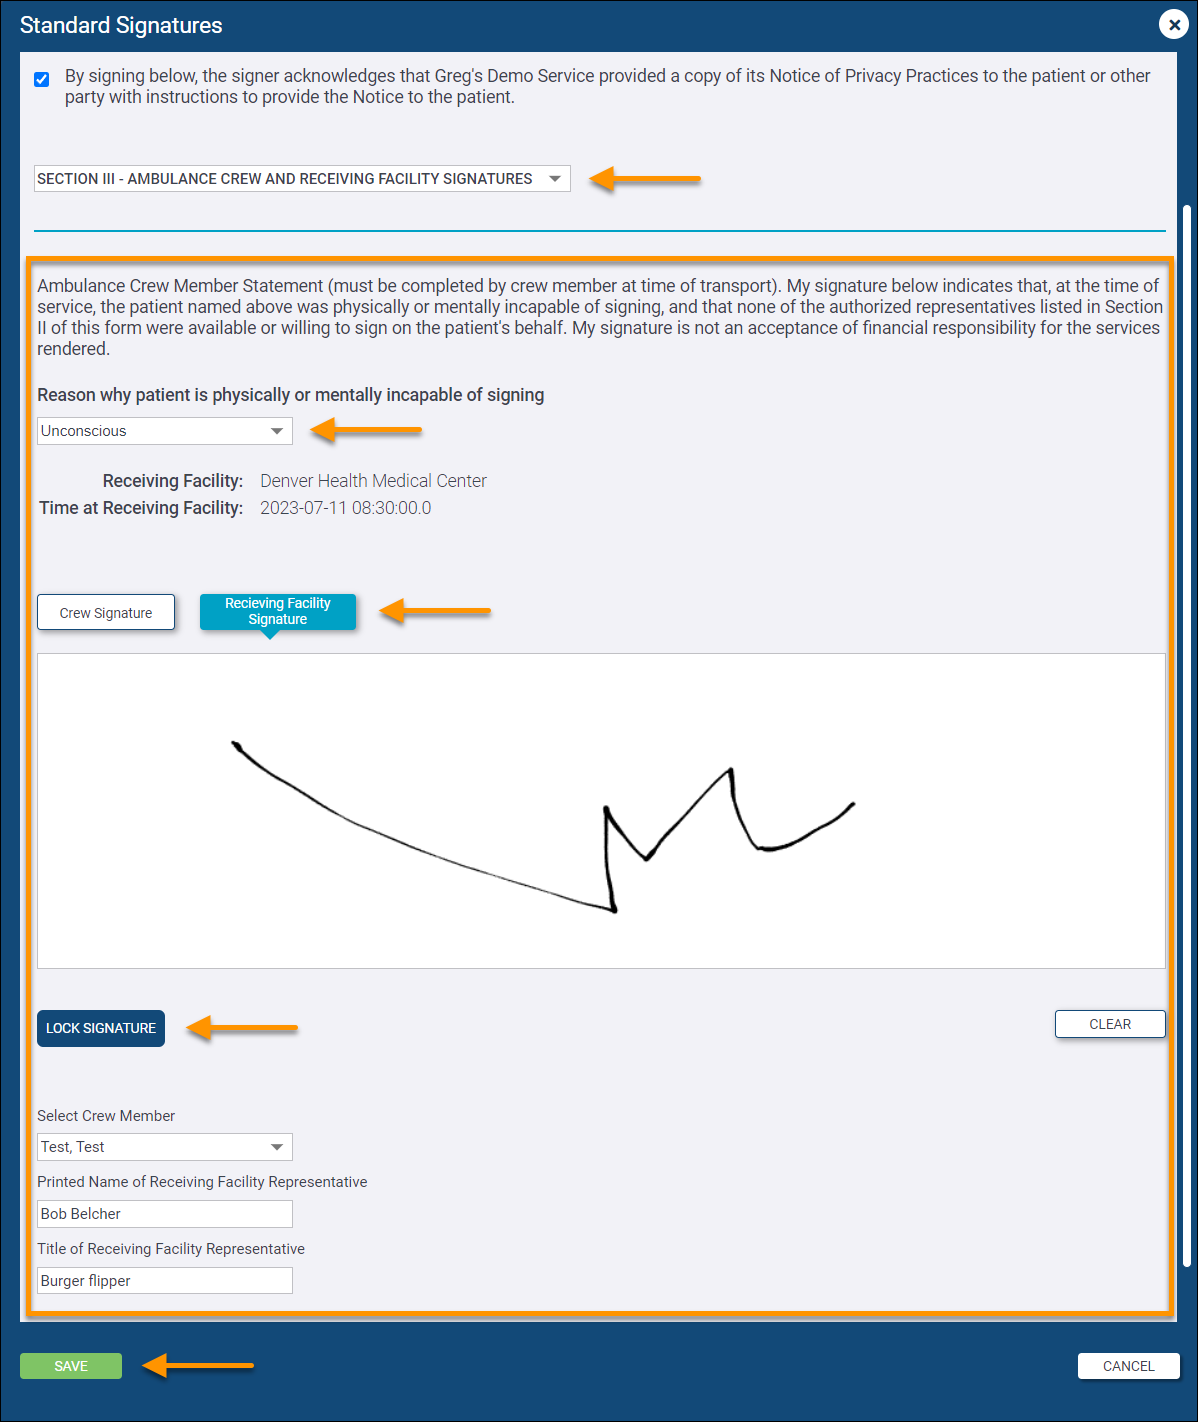
SECTION III - AMBULANCE CREW AND RECEIVING FACILITY SIGNATURES
Notes:
-
You must choose a 'Reason why patient is physically or mentally incapable of signing', select the crew member signing, and enter the name and title of the facility representative.
-
Make sure to switch to the Receiving Facility Signature canvas to capture the facility representative signature.
-
Custom Forms are used for capturing signatures that cannot be captured using the Standard Signatures form. Custom Forms look and function very similarly to Standard Signatures but allow administrators to create custom-labeled signature capture fields. Some use cases are ride-alongs, refusals, and intubation confirmations. You will not have any Custom Forms in your system unless a Service administrator has created and enabled them. Administrators, learn about Configuring Custom Forms.
To capture a signature using a Custom Form, click ADD + next to Custom Forms in the 'Print & Complete Miscellaneous Forms' section on Page 9 of a chart.
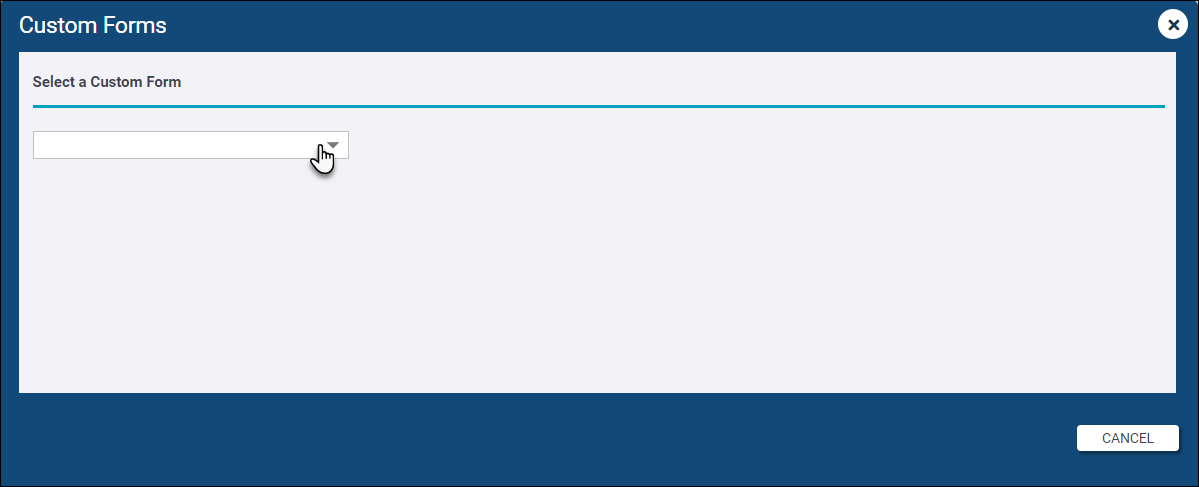
You will be presented with a drop-down menu to select the Custom Form you need.
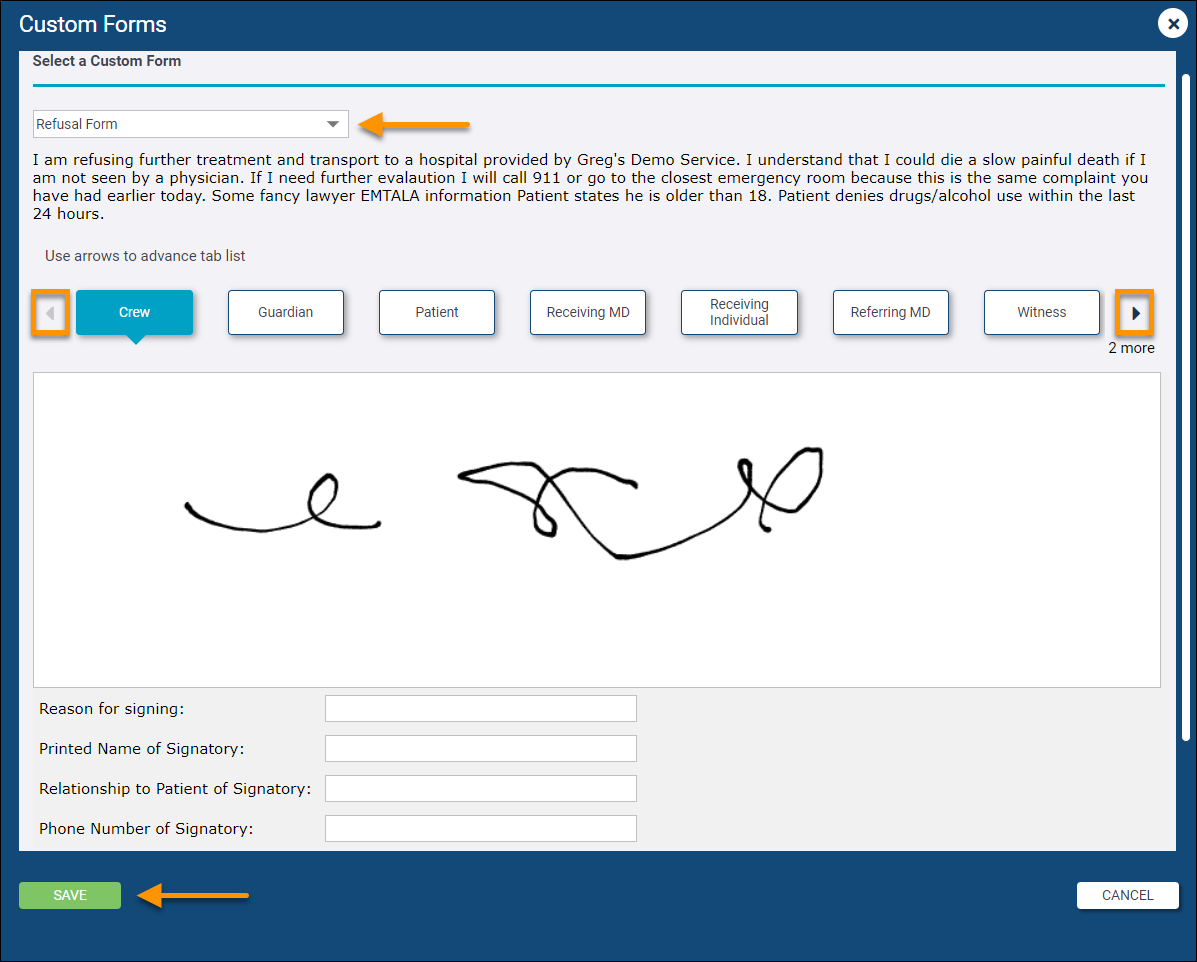
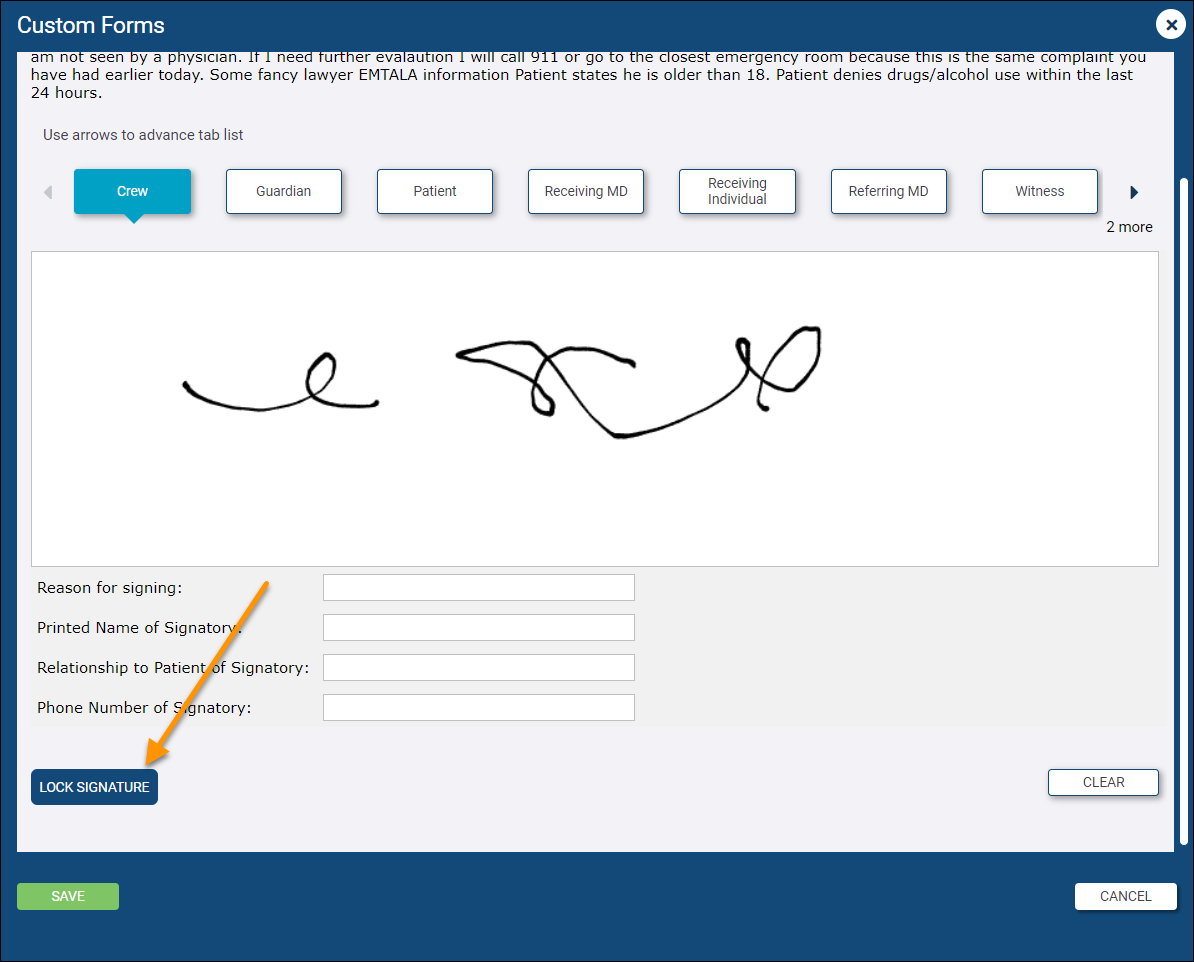
Once you select your Custom Form, the header and signature capture fields configured by your administrator will display along with the 'Reason for signing' field and the signatory name, phone number, and relationship to patient fields. Make sure to click LOCK after signing to capture the canvas. You must click LOCK for each signature you capture before moving to the next one. When you are finished capturing and locking all signatures and filling out the form completely, click SAVE to save and attach the Custom Form to the chart.
Notes:
-
You can switch to a different Custom Form at any time using the drop-down at the top - just make sure to lock and save any signatures captured in the current form first.
-
If you have enough signature capture fields to span off the screen, use the arrows to the left and right of the signature capture fields to see them.
-
You may need to scroll down to see the LOCK SIGNATURE button below the free-text signatory fields.
PDF Signature Forms allow administrators to upload PDF's into ZOLL emsCharts. When a PDF Signature Form is selected in a chart, ZOLL emsCharts places an invisible overlay on top of the form which allows crews to digitally markup the form using free-hand just like a digital whiteboard. The marked-up PDF will be saved to the chart. Some use-cases for PDF Signature Forms are PCS forms, discharge forms, and STEMI checklists. Administrators, learn about Configuring PDF Signature Forms.
To capture signatures using a PDF Signature Form, click ADD + next to PDF Signature Forms in the 'Print & Complete Miscellaneous Forms' section on Page 9 of a chart.
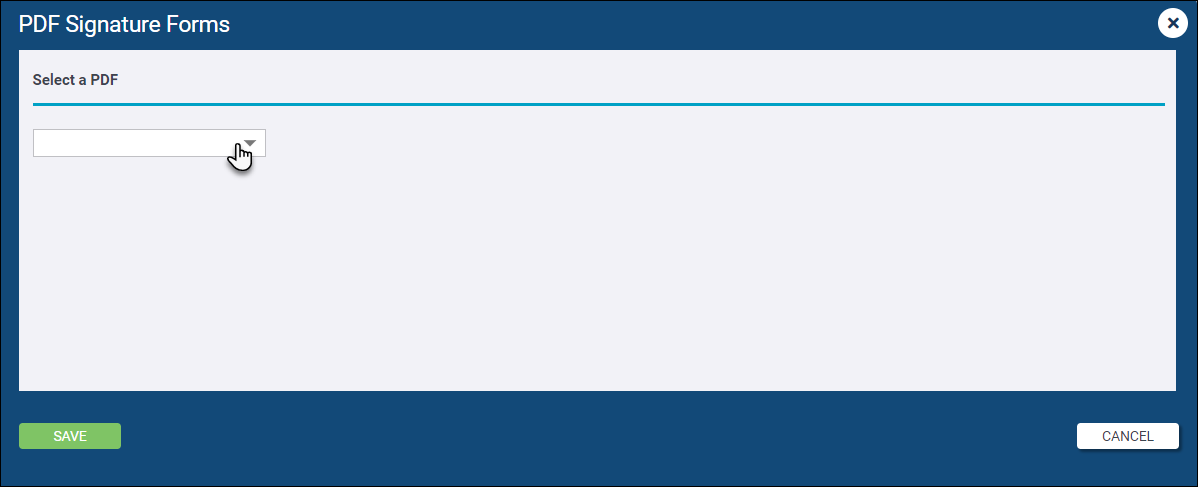
You will be presented with a drop-down menu to select the PDF Signature Form you need.
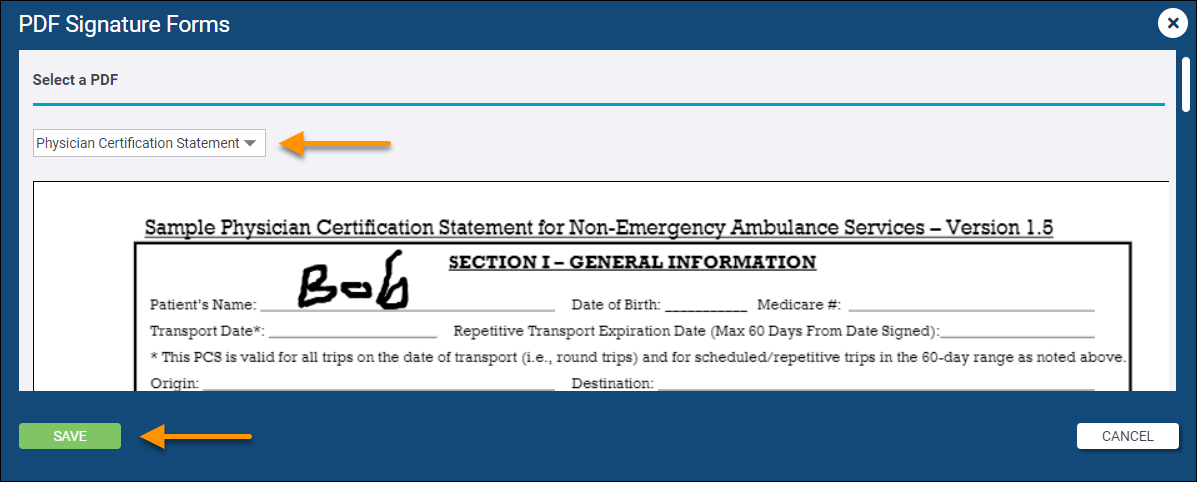
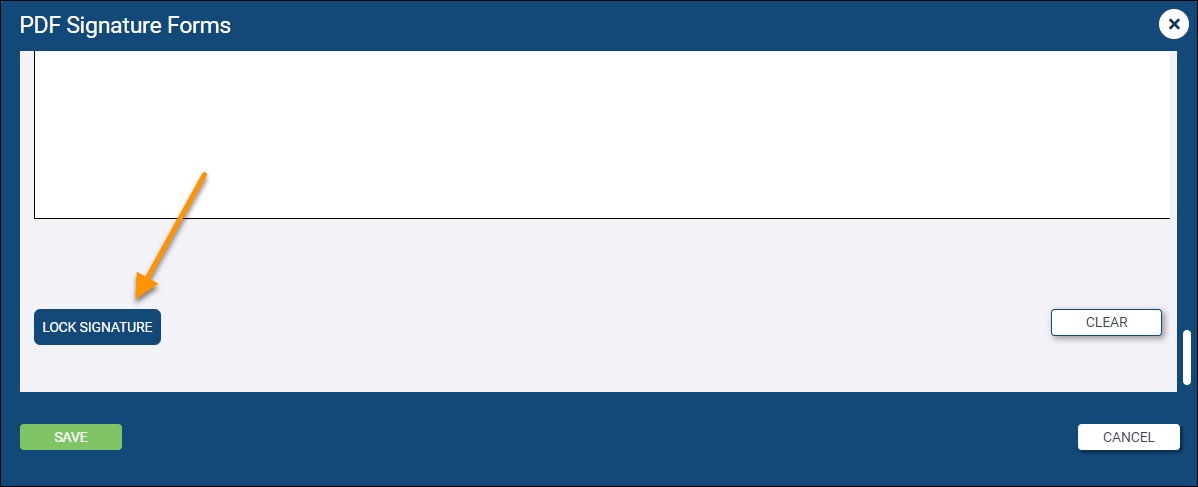
Once you select the PDF Signature Form you need, you can use your mouse (or finger or stylus if using a touchscreen device) to fill out the form as free-text. Make sure to click LOCK SIGNATURE and SAVE after filling out the form to attach the completed PDF Signature Form to the chart.
Notes:
-
You can switch to a different PDF Signature Form at any time using the drop-down at the top - just make sure to lock and save the current form first.
-
You may need to scroll down to see the LOCK SIGNATURE button below the form.
-
You can use your finger or a stylus on a touchscreen device to fill out your PDF Signature Forms.
Viewing collected signatures
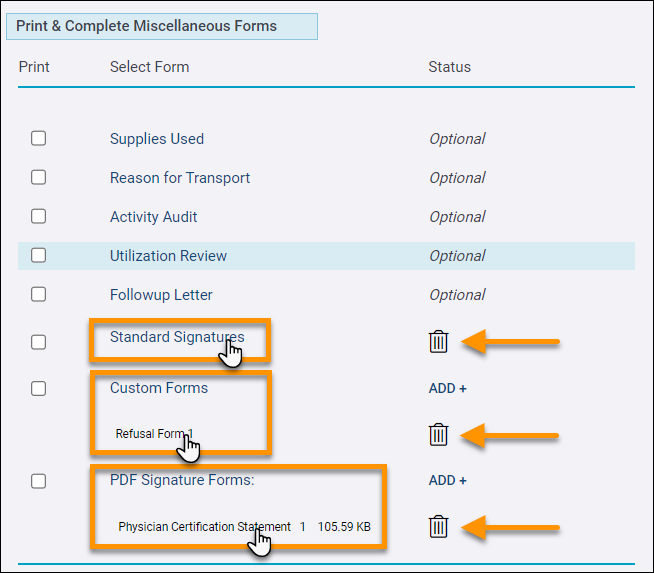
Once you have captured and saved signatures, you can click on the signature form on Page 9 to view it. You can also delete the form along with any signatures captured within it by clicking on the trashcan icon for that form.
